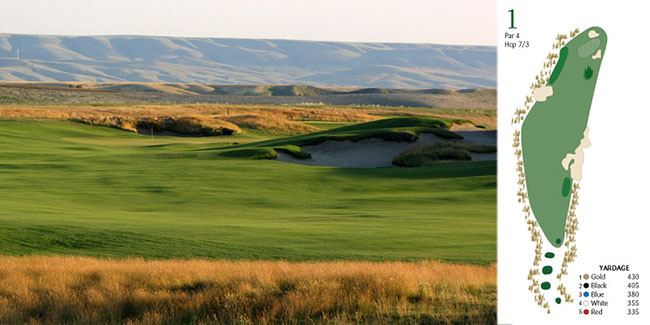
Hole 1
Beautiful slightly downhill par four dogleg right that introduces you to our dramatic bunker styles right off the bat. Second shot plays into the prevailing wind to a generous green with plenty of undulation.
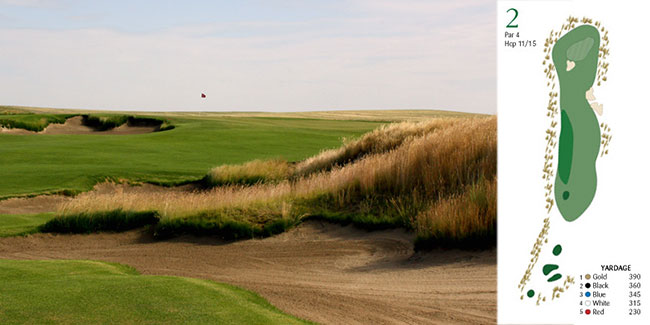
Hole 2
Short uphill par four with one of our smallest fairways. The shot into the green plays uphill but downwind to one of the more difficult greens to hold for those reasons.
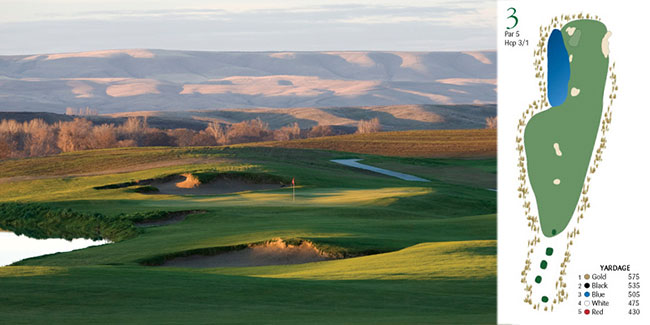
Hole 3
Largest fairway on the course split by a couple of testy bunkers, this par five generally plays into the wind and requires a couple of well struck and placed shots to get home in two.
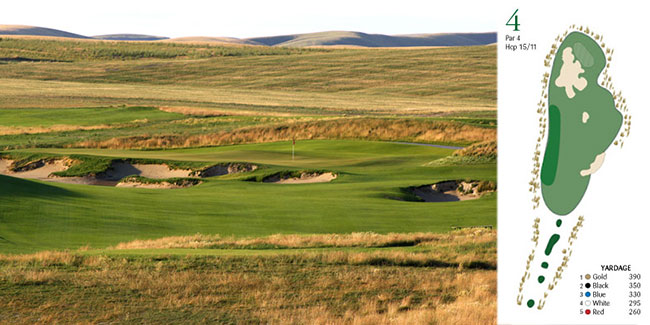
Hole 4
Short but tricky par four, avoiding the fairway and greenside bunkers are the top priority followed by closely negotiating the smallest green on the course.
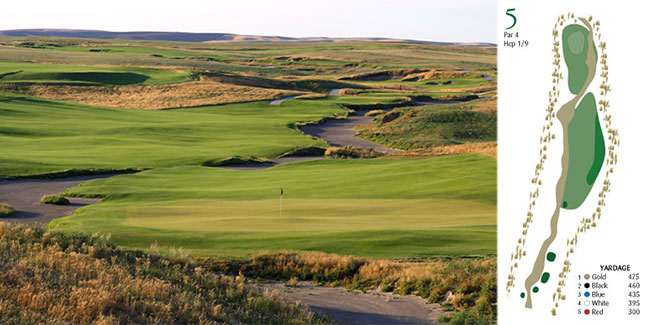
Hole 5
Let it rip on this great par four that is framed on the left side by a wash that cuts in front of the largest green on the golf course (11,360 sq. ft.) and then runs by the right side of the green. Par here is a great score!
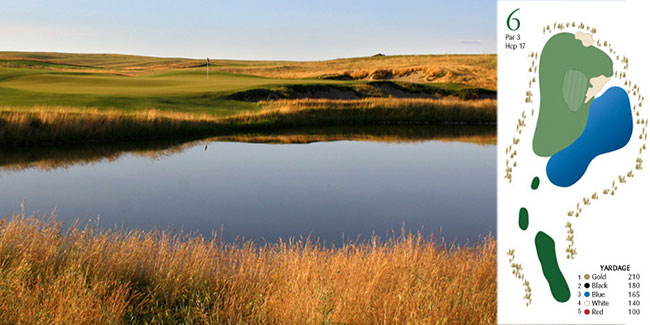
Hole 6
This is the first par three on the front nine and it normally plays downwind into a two-tiered green that is guarded on the right side by a bunker and water.
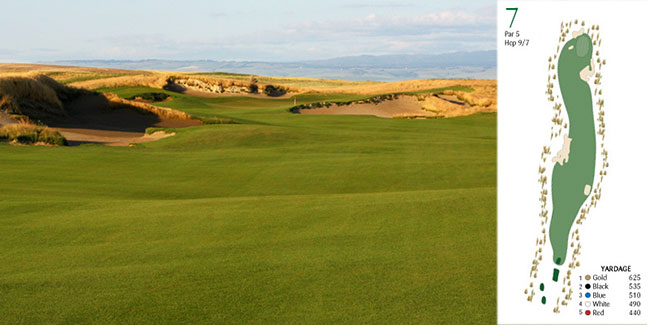
Hole 7
Downwind par five that can be reached in two with two well placed shots, and then the fun begins on one of the most fun greens on the course. It is a punch bowl, which allows many different angles of attack and use of a vivid imagination.
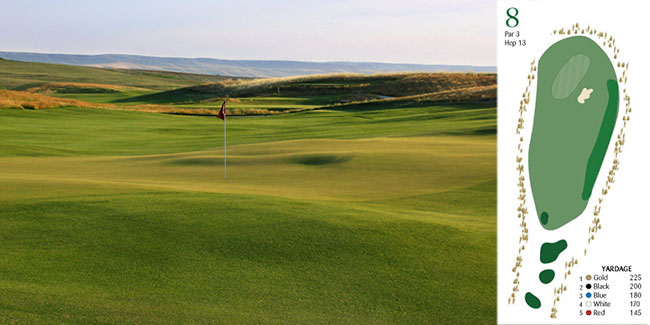
Hole 8
Our longest par three although usually downwind that plays to a large – and probably our most challenging – green.
Hole 9
Wonderful finishing par four that plays crosswind to an exciting green that is protected by bunkers and water on the right.

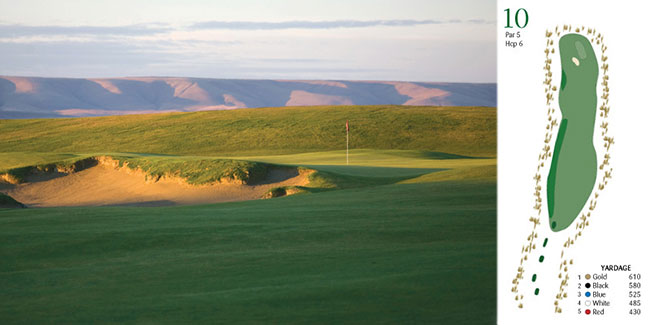
Hole 10
Challenging par 5 which normally play into the prevailing wind. Two well placed shots avoiding the fairway bunkers still leaves you a testy 3rd shot to one of the deepest greens on the course.
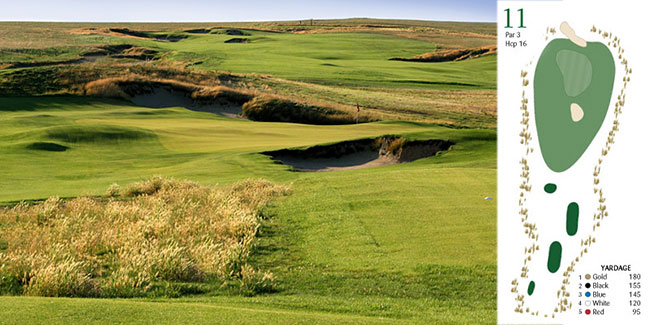
Hole 11
Deceiving par three with a great bunker short of the green and a tricky green to navigate.
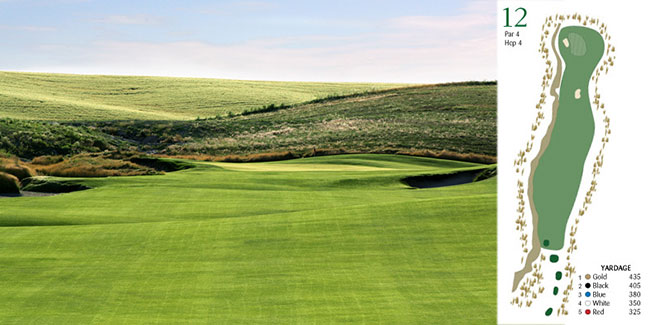
Hole 12
Beautiful uphill par four bordered by a wash all the way up the left side to a large undulating green.
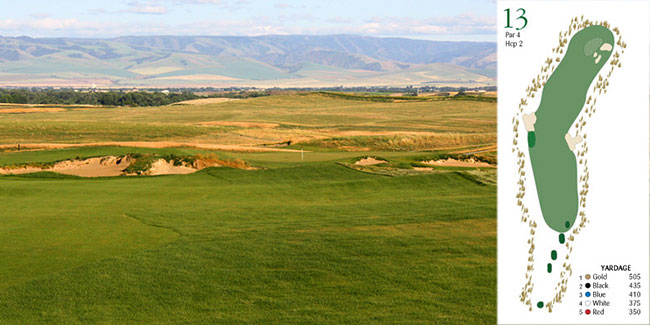
Hole 13
Longest par four on the course but generally plays downhill with a helping wind to a great green sight protected by bunkers on the right.
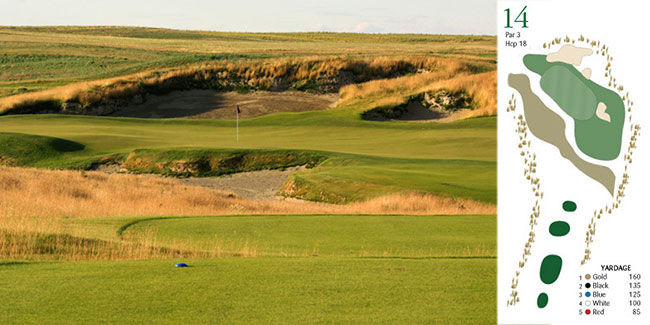
Hole 14
Shortest par three on the course with the second largest green on the course, so a two putt might be a challenge even if you hit the green.
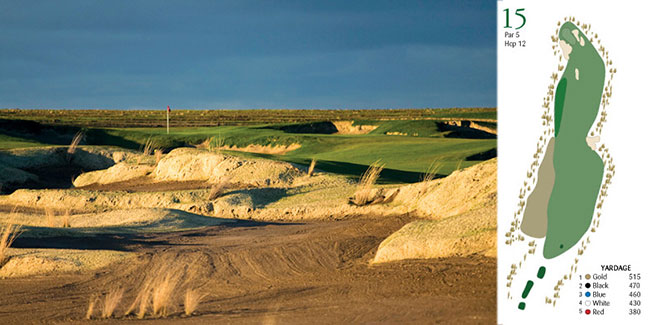
Hole 15
Very fun short uphill par five with all sorts of options playing to a small well bunkered green.
Hole 16
Great views from this medium length par three that normally plays downwind to another challenging green to hold.

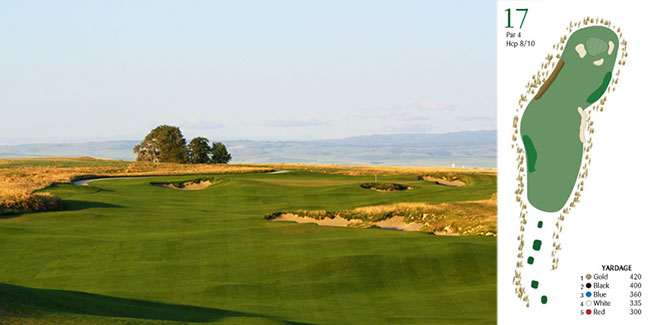
Hole 17
Beautiful downwind downhill drive followed by an uphill shot into yet another exciting green, especially if the hole location is on the front of the green.
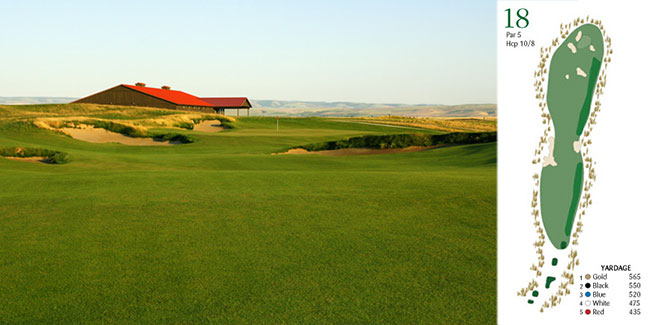
Hole 18
Downhill par five with bunkers protecting both sides of the fairway, great risk reward finishing hole that keeps you thinking all the way to the hole.